So as started out here: http://dj-bonsai.blogspot.co.uk/2016/04/a-lovely-japanese-white-pine.html I had spent tens of hours stripping back and thinning the needles to balance the growth in this lovely old pine
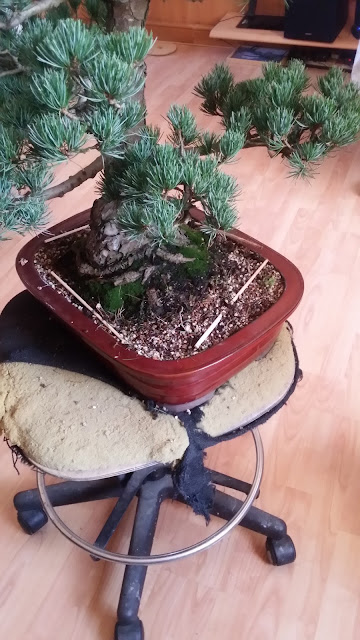
Prior to wiring I had to set up some anchor points for guy wires. I debated this for quite some time, and eventually opted for running a long piece, looped at each end from underneath the rootball. This would provide a single looping anchor point for any guy wires. I ran one side to side and one end to end. I pushed a chopstick through the loop while tightening the wire underneath to prevent it beign lost under the soil (see below)
As you can see - 4 chopsticks = 4 anchor points for the guys I was about to install. Why guy branches instead of using heavy gauge wire? well there are a couple of reasons, but mainly; you can leave guy wires on pretty much indefinitely for the branches to set, while wire needs removing periodically to prevent bite and scarring.
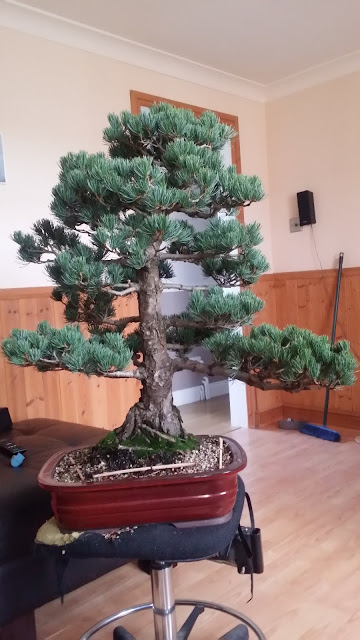
The first branch(es) I got to work on were the ones to the left of the front. although from the front it looks like one branch it is in fact 2 coming from the same point on the trunk. However, they are growing at different heights and needed levelling out and pulling together to create the illusion of a single pad (see below - the branch in the centre and the one on the right comprise the left of the tree) - they are very separate and apart they don't do anything to enhance the image of the tree/
As you can see from this frontal picture, the two branches in question are lifting away from the pot. They need bringing down together and a single pad creating. In fact, this is the case with pretty much every shoot and branch..
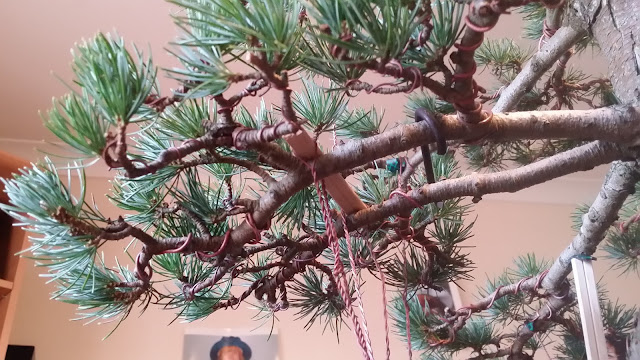
I snapped a chopstick in half, and laid the two pieces next to each other, which I then laid on top of the two offending branches, then used three guy wires to pull them down in unison, flattening the branches out. Doing it this way I ended up with no wire touching the branches, so this can be left on, in theory, for ever, as the guys are pulling down on the chopstick, not the branches.
I also used a piece of 3mm Aluminium wire (look to the right of the chopsticks) looped at each end to create a simple device to pull the branches together. Between the guys and this I was able to create a single pad from the two branches and should be able to leave it all in place for long enough for it to set fully.
The more observant amongst you will also notice another pair of chopsticks apparently propping up a branch at the back.
It's actually providing me an axis to bend the branch as it was pointing upwards in an ugly curve. By pushing this into the soil I was able to tie a guy to the end of the branch, and then tighten, flattening the curve. A word of caution doing this, it can put quite a bit of strain on the branch - beware of snapping!
There were a number of branches which needed pulling down so I hit them all and the guy method worked really effectively. So, once I'd sorted out the number of guys, I started wiring, to spread and build new more organised pads and allow light into the new buds which had formed.
Bottom 5 branches wired down, pads formed....still a long way to go
almost there, just the tricky apex and couple of branches below it
Phew - done.
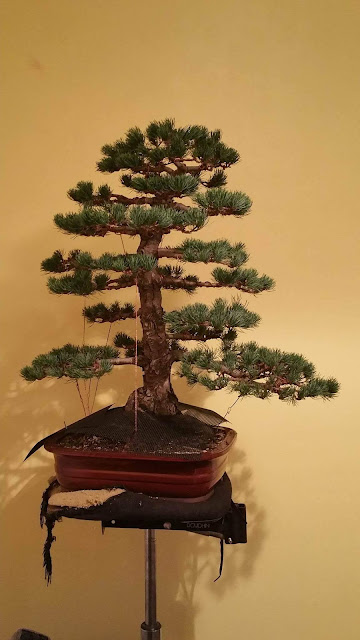
Before.......
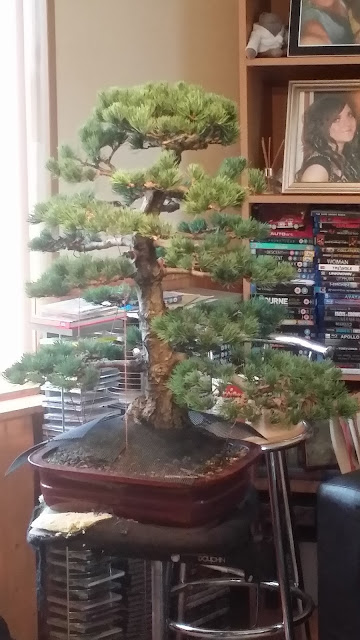
...........after. Looking a tad more refined now and plenty of light/air getting to those buds.
Another angle
Approx. 18 or so hours to needle strip and about the same again to wire. A rather knackered and podgy model for scale purposes!
(Tartan slouching pants and tee shirt with trees obligatory)
Here's to a nice filling out period this year. I suspect the needle length will be slightly longer this year as I removed a fair bit of foliage, but this has been a challenging tree and I'm delighted with the results
Thanks for reading...







No comments:
Post a Comment